Horizon Web Console: Instances
Under the Project and Compute tabs, use the Instances screen to manage the instances in your project.

Create an Instance
On the Instances screen,
-
Click on the
Launch Instancebutton in the upper right corner.
-
The
Launch Instancescreen has multiple tabs. Tabs requiring additional user input are denoted by*. Under theDetailstab, enter:- Instance Name: Name the new instance
- Count: Increase the number of instances to launch. Default is 1.

-
Under the
Sourcetab, select the source of the boot volume. The source can be one of:
-
After selecting the source type, click on the up arrow button to select a specific source:
- Create New Volume: Leave to default
Yes - Delete Volume on Instance Delete: Select
Yesif you want the boot volume to be automatically deleted with the instance. - Volume Size: The size of the boot volume will be defaulted to the size of the selected boot source. You can specify a larger boot volume size here.

- Create New Volume: Leave to default
-
Under the
Flavortab, click on the up arrow button to select the flavor of the new instance. Note the flavor c128.m240 is incompatible with Windows images.
-
Under the
Networkstab, select thepublicnetwork or one of the private networks in your project by clicking on the up arrow button.
-
Under the
Security Grouptab, use the up and down arrow buttons to add or delete security groups for the new instance.
-
Under the
Key Pairstab,- If you have more than one keypair registered in your user account, use the up arrow button to select the keypair to use for the initial login.
- If only one keypair is registered in your user account, that keypair will be selected by default.
- You can also create a new keypair or import an existing public key by clicking on the
Create Key PairorImport Key Pairbutton near the top of the screen.

-
Click on the
Launch Instanceto launch the instance.
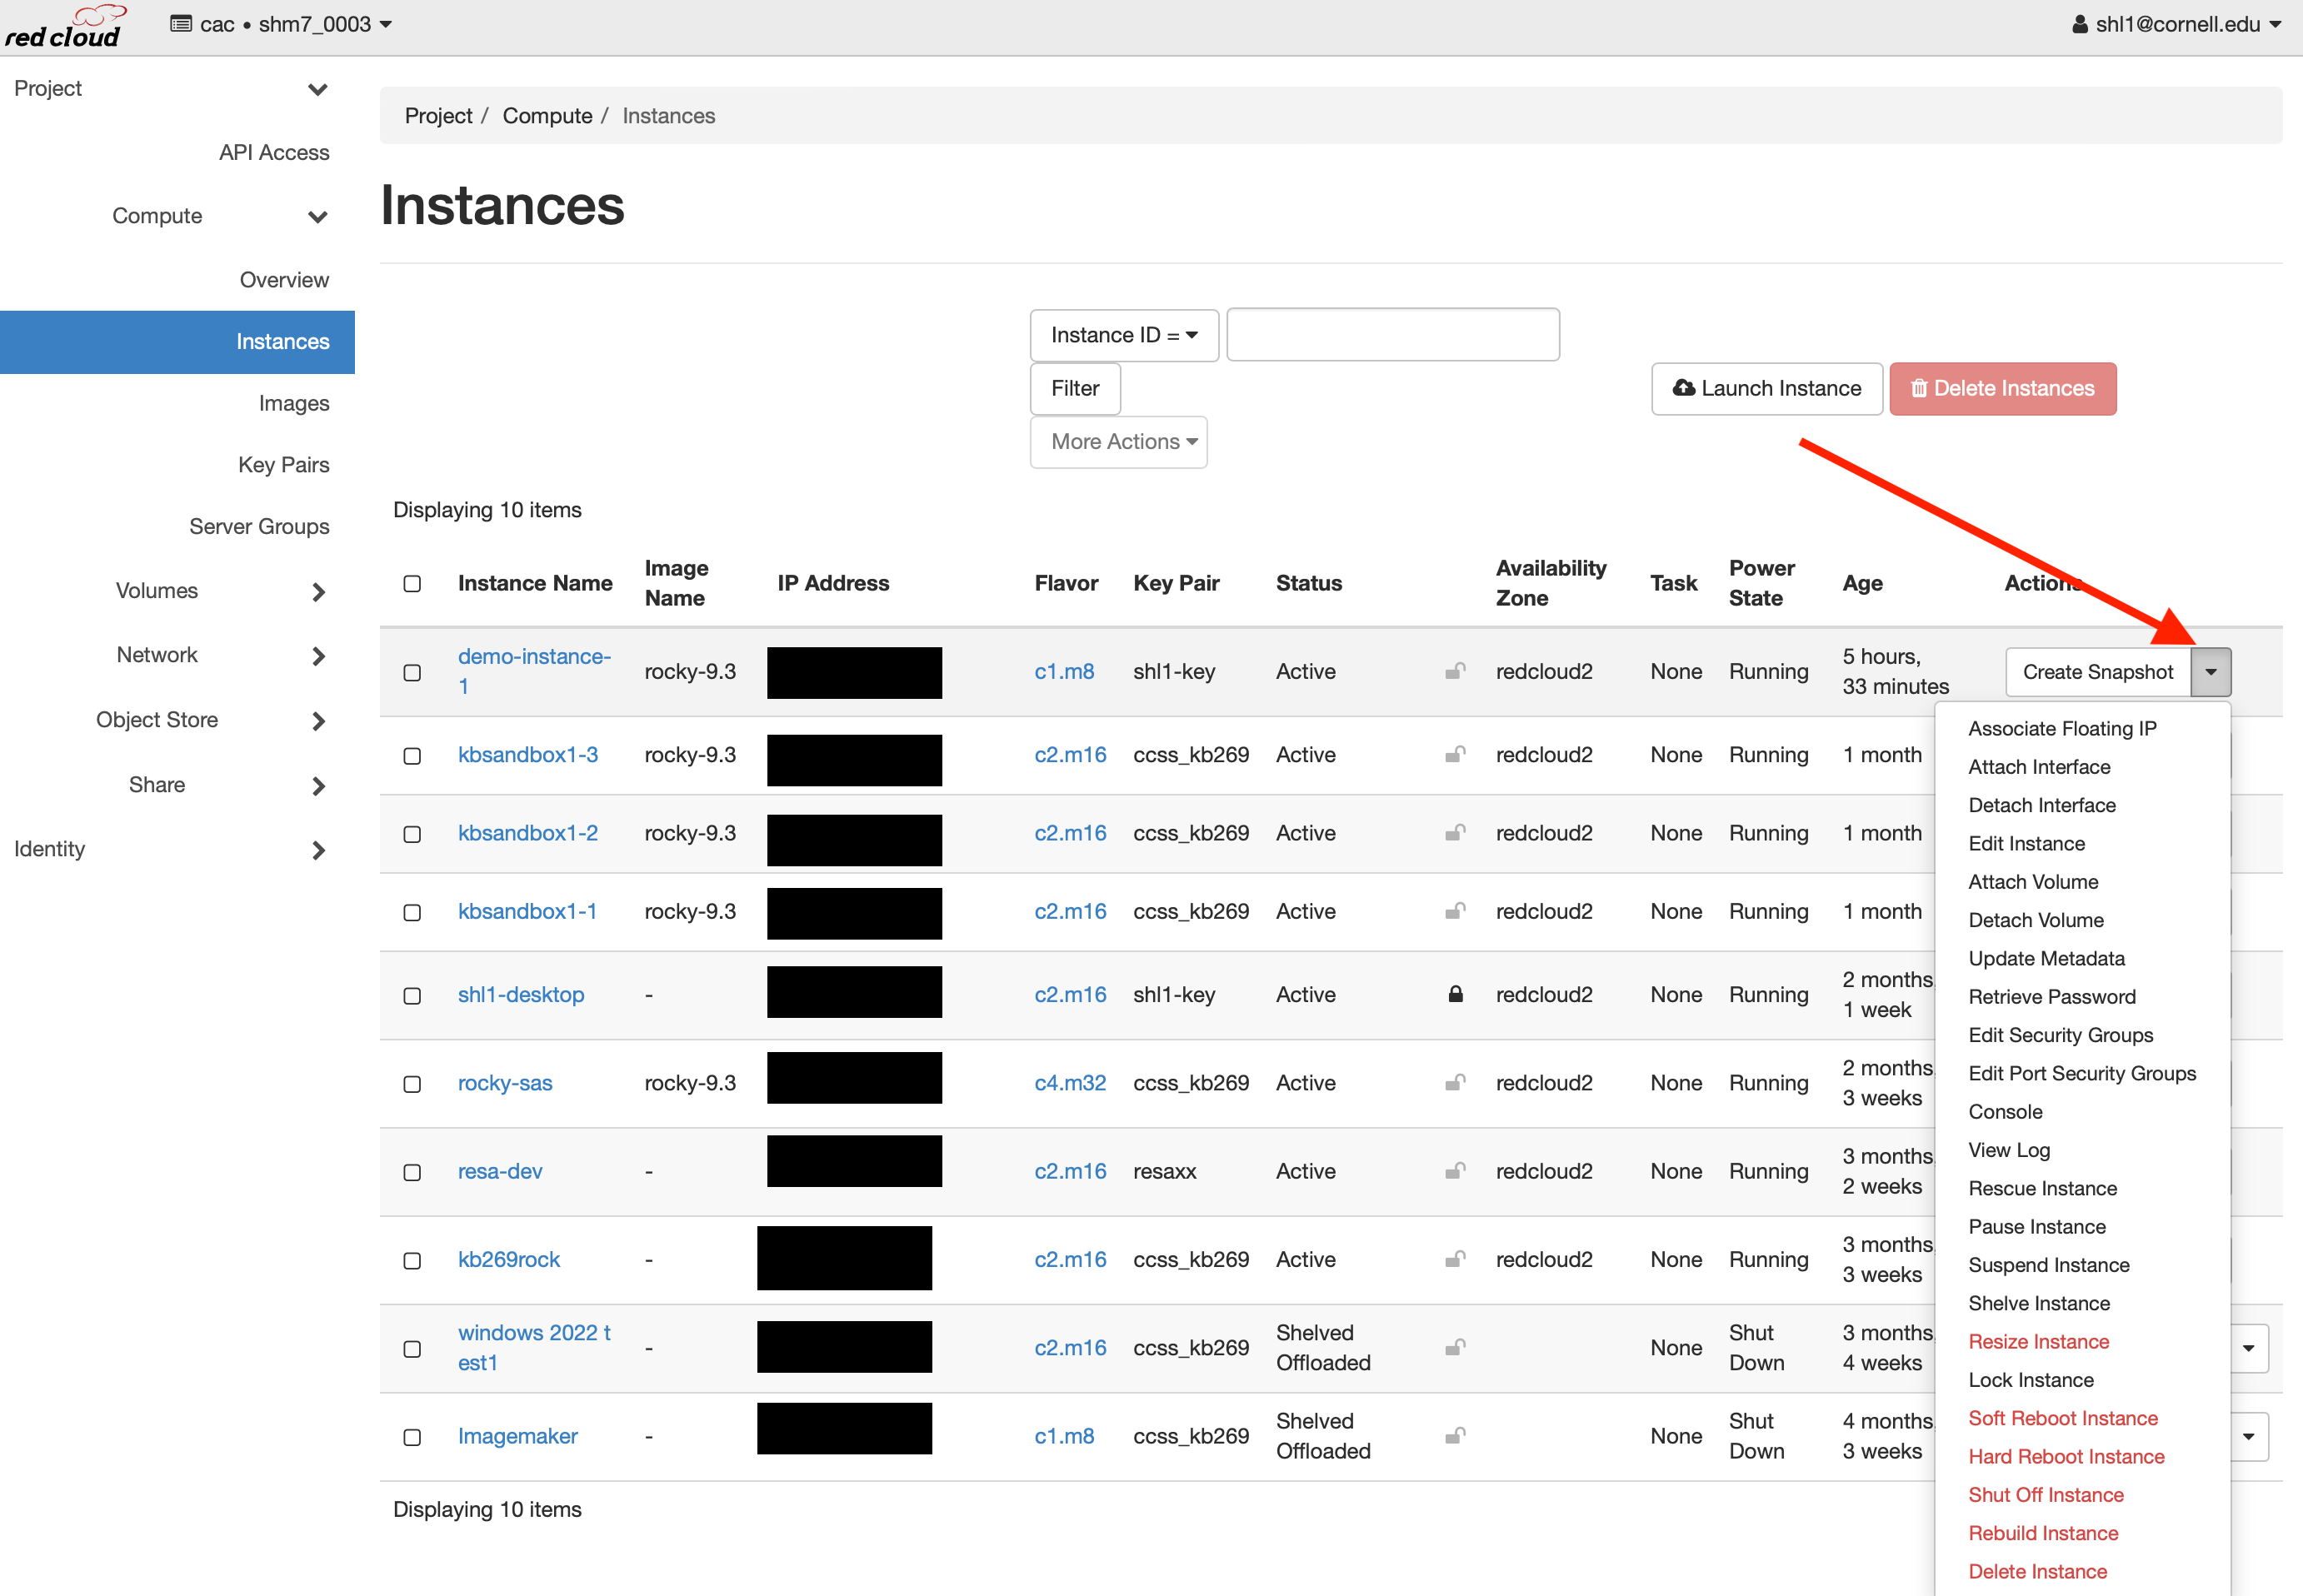
Operations on an Instance
On the Instances screen, click on the pull down menu next to the instance to see the available operations:
Edit Instance Name and Security Groups
To change the name or modify the security of an instance, select Edit Instance in the pull down menu.
On the Edit Instance screen,
-
Under the
Informationtab, change the name of the instance.
-
Under the
Security Grouptab, use the '+' and '-' buttons to add or remove the instance to or from a security group.
-
Click on the
Savebutton for the changes to take effect.
Delete an Instance
To delete an instance, select Delete Instance in the pull down menu.
Note
If the boot volume was set to be deleted with the instance when the instance was created, the boot volume will be deleted as well.
Shelve an Instance
To shelve an instance, select Shelve Instance in the pull down menu.
Unshelve an Instance
To unshelve an instance unshelve an instance, select Unshelve Instance in the pull down menu.
Resize an Instance
Note
Resizing an instance in the "Active" state will reboot the instance, so be sure to save any active work before attempting.
-
To resize an instance, select
Resize Instancein the pull down menu. -
On the
Resize Instancescreen, select the new instance flavor.
-
Click on the
Resizebutton. The instance will now reboot and resized to the new flavor you just specified. Continue to the confirm instance resize section.
Confirm Instance Resize
To confirm an instance has been resized, click on the Confirm Resize/Migrate button next to the instance.

Pause an Instance
To pause an instance, select Pause Instance in the pull down menu.
Note
Pausing an instance does not free up cloud resources taken by the instance. Your project will continue to be charged for usage until the instance is either shelved or deleted.
Suspend an Instance
To suspend an instance, select Suspend Instance in the pull down menu.
Note
Suspending an instance does not free up cloud resources taken by the instance. Your project will continue to be charged for usage until the instance is either shelved or deleted.
Resume an Instance
To resume a paused or suspended instance, select Resume Instance in the pull down menu.
Soft / Hard Reboot an Instance
To soft or hard reboot an instance, select Soft Reboot Instance or Hard Reboot Instance in the pull down menu.
Shut Off an Instance
To shut off an instance, select Shut Off Instance in the pull down menu.
Start an Instance
To start a stopped instance, clicked on the Start Instance button next to the stopped instance.
Attach a Volume to an Instance
-
Select
Attach Volumein the pull down menu. -
On the
Attach Volumescreen, select the volume to attach and click on theAttach Volumebutton.
Detach a Volume from an Instance
-
Select
Detach Volumein the pull down menu. -
On the
Detach Volumescreen, select the volume to detach and click on theDetach Volumebutton.